Call us:
754 263 3042
Thank You
Your account is pending approval. You’ll receive a confirmation email once activated.
Thank You
Your account is pending approval. You’ll receive a confirmation email once activated.
Step and repeat banners are event staples for a reason. They scream "VIP" and instantly turn any corner into a high-energy photo op. But for you, who has to get them to their clients, the real value isn't in the glamour—it's in the results that will keep those same clients coming back to you.
When talking to your clients, position them less as an expense and more as an investment that can bring in more revenue if their potential is used to the max. Shift the focus from price to value. A great banner in smart hands can be a powerful tool for:
This guide will walk you through what it takes to create an effective step and repeat banners from designs to materials to application.
It should be no surprise that a design can make or break a banner. It’s not just about how a banner looks—it's about how that banner reads to the client. You can make the most sophisticated, slick, beautiful design possible, but if it doesn’t deliver the message the client needs to the proper audience, then all is for naught. The banner should build client trust and perform flawlessly under pressure, catching all the proper eyes and lodging itself in guests’ memories.
There’s a place for every banner size but not every banner size is for every event. Choosing a scope is a strategic decision. Before you give your clients any definite recommendation, you should carefully consider the event space and the intended use.
You might have noticed that the width is flexible and changes based on the type of photography we’re looking to attract, but the height stays the same. It’s for a good reason—an 8-foot height is considered a golden standard: it fits most environments but still leaves plenty of room above guests' heads to keep sponsor logos visible.
The secret to a great custom step and repeat design is using the "Goldilocks Principle" for logos. If they're too small, they become unreadable in photos; if they're too big, they get completely hidden by the people standing in front of them. The ideal size is somewhere in the middle: a logo should be large enough for a guest to easily recognize and remember it at a first glance, but small enough that several complete logos surround the subjects in every photo, but do so seamlessly. Properly spacing them is crucial; you need enough distance for each logo to breathe, but not so much that you lose the cohesive, repeating pattern.
Glare prevention is the “ingredient” that is often overlooked but causes problems once the banner is at an event: nobody likes their photos ruined by camera flashes. Those photos simply don’t find themselves on social media, i.e. a lot of the effect the banner could’ve had is lost. Luckily, the fix is simple enough: if your client chooses vinyl, it must have a matte finish. For a guaranteed glare-free experience, recommend fabric. Additionally, advise clients against stark white backgrounds, which reflect the most light.
Before we put the banner into production, ask your clients to go through this simple checklist for their artwork. It’ll go a long way towards getting the exact banner they want and preventing costly reprints:
The material is what determines the banners’ final looks, especially when flashes start popping. Usually the choice comes down to two options: durable vinyl or premium fabric. Both have their upsides and downsides:
Matte Vinyl is durable and budget-friendly. It’s tough, typically tear-resistant, and waterproof, making it a great choice for high-volume orders or events that might be held outdoors. It comes in different weights, ranging from 13oz or the heavier 18oz. Heavier fabric typically means added durability and a more substantial feel. It must be a matte finish to prevent glare.
Fabric is inherently non-reflective, so there is zero risk of glare. It’s a more premium choice used at high-end galas, media events, etc.—situations where photography is critical. It’s lighter than vinyl and highly wrinkle-resistant. High fabric quality is usually achieved with dye-sublimation—the ink turns into a gas and permanently fuses into the very fibers of the material. It makes for vibrant, sharp graphics that won't crack, peel, or fade.Use this cheat sheet to guide your clients to the perfect choice.
| Material Type | Glare Resistance | Portability & Weight | Wrinkle Resistance | Durability | Print Method | Ideal Client Use Case |
|---|---|---|---|---|---|---|
| Matte Vinyl (13oz/18oz) | Good (with matte finish) | Heavier; must be rolled | Prone to creasing if folded | High (tear & weather resistant) | UV-Printed | Outdoor events, long-term installations, budget-conscious promotions |
| Polyester Fabric (e.g., 9oz Oxford) | Excellent (inherently non-reflective) | Lightweight; often foldable | Highly wrinkle-resistant | High (machine washable, fade-resistant) | Dye-Sublimation | High-end galas, media events, trade shows, red carpet events, any application where photo quality is paramount. |
A great graphic needs a great stand. Having the right hardware options in your back pocket lets you cater to any client's vision, venue, or budget.
A huge benefit for you is that clients can always update their branding by ordering just a new graphic for their existing hardware. This is a key advantage of sourcing your step and repeat banners wholesale and a great way to generate repeat business.
| Stand System | Key Features | Ideal Use | Assembly Complexity | Portability | Main Benefit |
|---|---|---|---|---|---|
| Telescopic Stand | Adjustable height & width | Events requiring flexibility for various banner sizes; budget-conscious projects. | Low (one person) | Good (comes with case) | Maximum Flexibility & Versatility |
| Pop-Up Stand | Large, seamless graphic; accordion frame | Large media walls, press conferences, trade show back walls. | Low-Moderate (one person, easier with two) | Good (wheeled case often included) | Maximum Brand Real Estate |
| Eurofit Tube (Straight/Curved) | Lightweight tubes; "pillowcase" fabric graphic | Modern corporate events, traveling roadshows, sleek presentations. | Low (one person) | Excellent (very lightweight) | Modern Aesthetic & Ultimate Portability |
| SEG Pop-Up Stand | Frameless, taut appearance; silicone edge | Luxury retail, art galleries, high-end trade show booths, product launches. | Moderate (two people recommended) | Good | Premium, High-End Feel |
Your job isn't over once the sale is made. Giving your clients these simple care tips protects their investment and makes you look like a hero.
The most important rule? ROLL, DON'T FOLD. Make sure your client knows that if they fold the banner, it’ll create permanent, ugly creases likely ruining the smooth finish. Instead, they should always roll the banner. When rolling, the graphic should face inward—that’ll protect the printed surface. Then it should go into its protective tube or case. Warn the client to store the case in a space that's cool and dry. The ideal environment will have a stable temperature and humidity—think an indoor closet, not a hot garage—to protect colors from fading and the material from getting brittle. Proper storage will significantly increase the banner lifespan.
To clean the vinyl banners, wipe them down with a soft cloth and mild soap. The fabric banners are usually machine washable on a gentle, cold cycle (just be sure to line-dry them!), but do double-check with our representative—certain fabrics require more careful handling than others. Also, be sure to manage client expectations by letting them know that hardware and graphics often ship in separate packages—they shouldn’t worry if one arrives before the other, it happens more often than not.
Step and repeat banners are some of our most frequently ordered products and these are the questions we get most often from new trade partners:
It’s all about scale and purpose. A step and repeat is for photo ops, usually sized around 8x8 ft or 10x8 ft with a repeating logo pattern. A media wall is typically a much larger, single graphic that serves as a backdrop for a stage or press conference.
Depends on how many people you expect to take a photo in front of it at the same time! The most popular size is 8x8 ft—a common option that easily fits small groups (think 2-4 people at the same time), while still highlighting brand logos. If your client expects large groups then they should opt for a 10x8 ft banner. But it depends on the event and purpose, really. Our systems can accommodate everything from smaller 5 ft displays to massive 20-foot wide walls—tell us more about your project and the intended effect, and we’ll help you customize.
For watertight effect, you need to go for a fabric that’s naturally non-reflective and a darker color for the background, as dark colors absorb light.
If ordering a banner at All for Signs, we’d advise you to go for a dye-sublimation fabric banner with a dark or medium-gray background—it’s pretty much a foolproof combo guaranteed to suck up any stray camera flashes.
First, establish a hierarchy. The sponsorships should be divided into tiers (more sponsorships you have, more tiers there should be, but don’t go overboard, keep it to four or five). The more important the sponsor, the higher tier they go in and the larger placement they get.
Use a neutral background like gray or off-white to unify the design. If it’s possible to convert all logos to a single color (e.g., all white)—do just that, it’ll create a “cleaner” look, with none of the logos crashing, though, understandably, that’s not always possible—in this case, you should work with a designer to figure out how to group the logo colors most favorably.
And, last but certainly not least, use a precise grid to align everything perfectly. It’ll make the banner look slick and the logos look organized, not random.
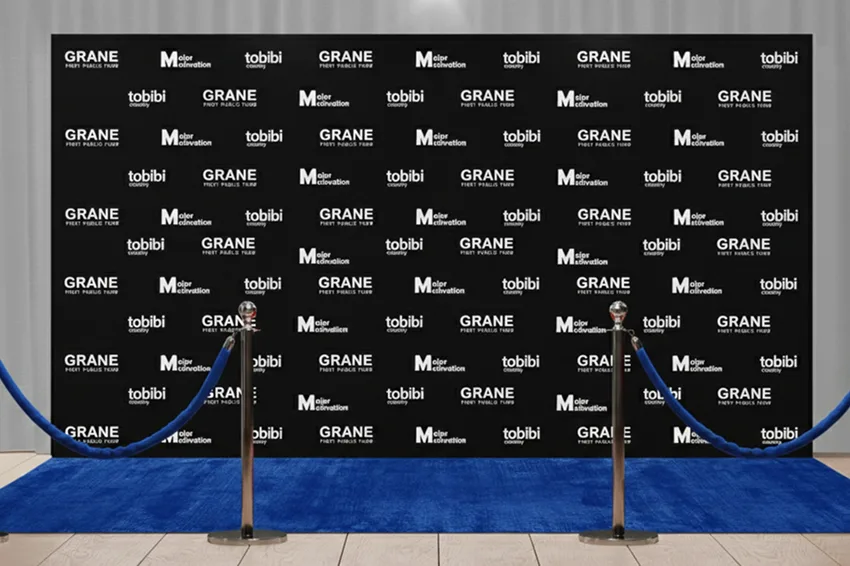
Make a true "red carpet moment" for the photo-op. You can add details like a red carpet runner and stanchions with velvet ropes. It’s a combination that people often associate with luxury so it can turn a photo op into a memorable experience. A banner like that won’t be forgotten anytime soon.
It has its time and place, though. Sometimes you might need to advise the client against it, instead of suggesting it.
A high-quality dye-sublimation fabric banner can easily last for 3+ years of regular event use if your client properly cares for it—cleans and stores it like we advised above. Rough physical handling and care are often what makes the banner unusable, rather than the print itself fading.